Saturday, 29 December 2012

Jeep Track and Ash Valley


You know how it is in summer in Cape Town. Shortly after Christmas, someone says "let's go hiking!"  Personally I usually think "why now, when it's so hot?"  But I usually go along anyway, and always enjoy it. 

Yesterday's half-day hike was a day-tripper classic: up the jeep track to the dams, and down again in time for lunch. We started at 7:30 to miss the heat, but it was still pretty hot on the way up. I know there are many people who miss the shade of the pine forests, but I'm all in favour of fynbos and views instead, so I'm pleased that they're mostly gone.  The watsonias and pincushion proteas were out in force.
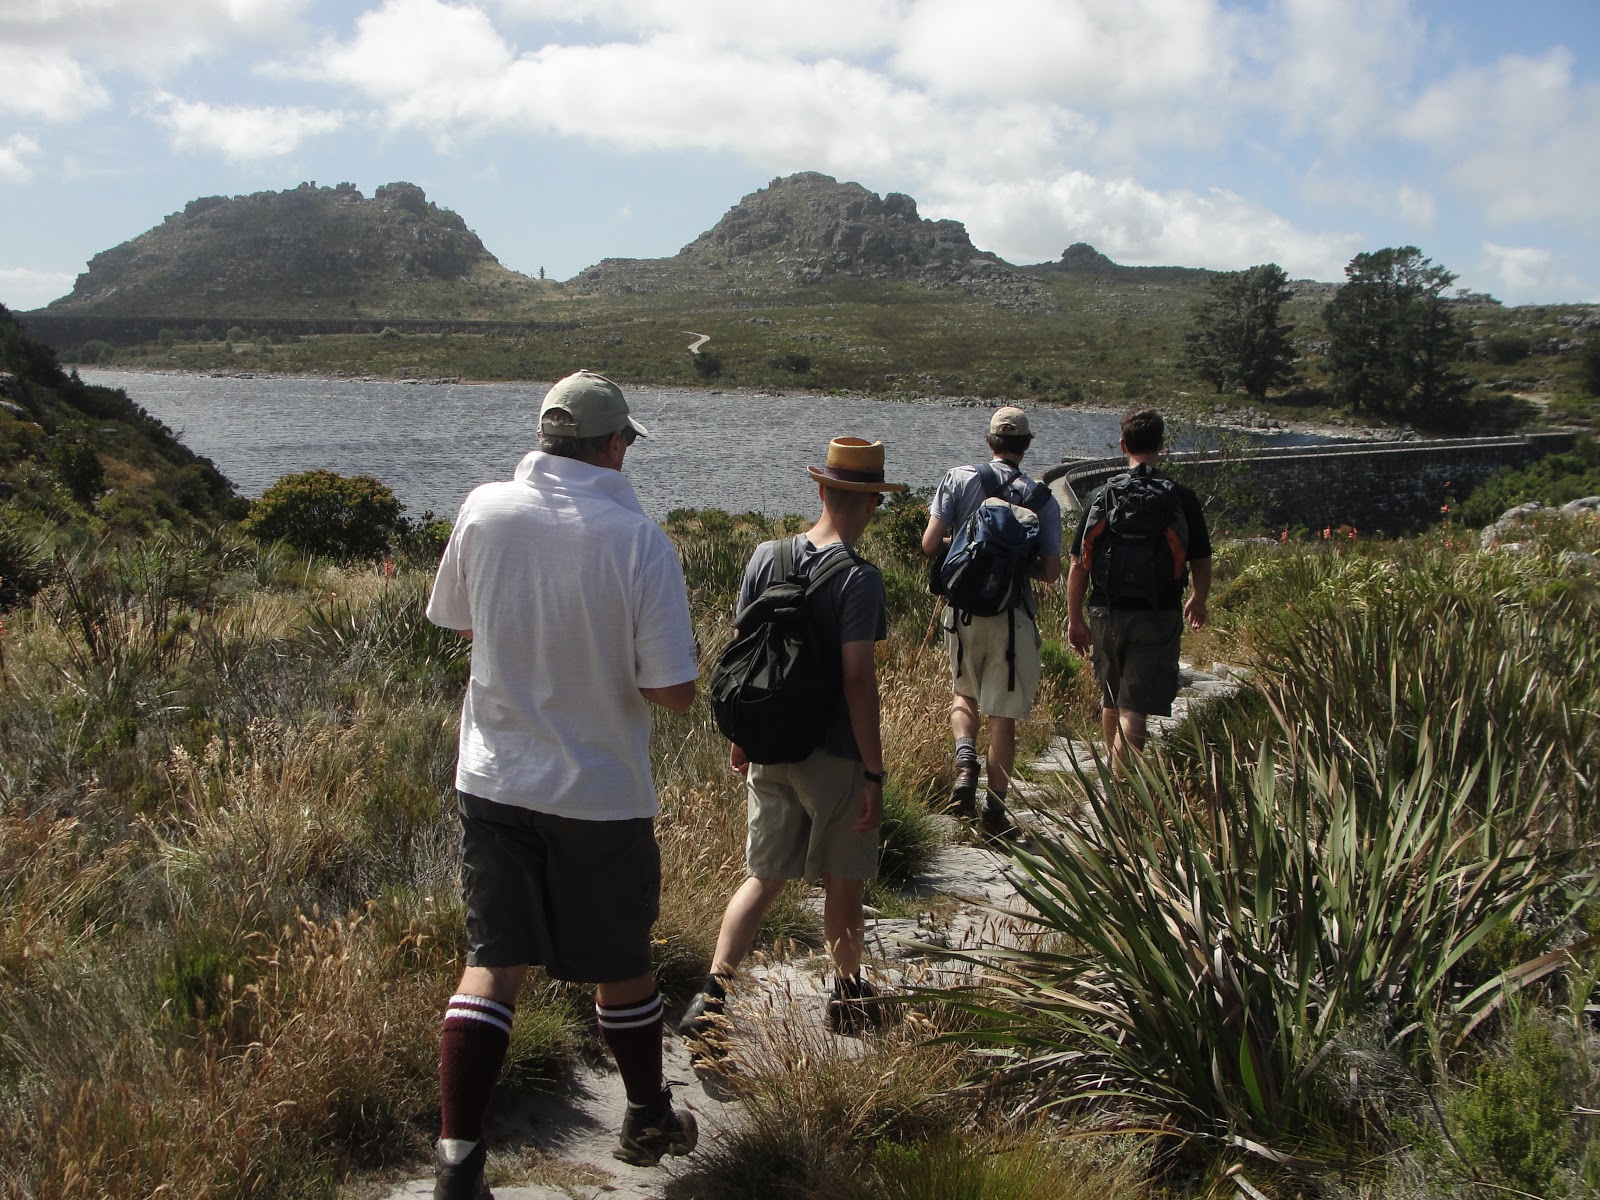
Once on top, we took a look at the dams.  One of our group is a water engineer who worked on the reinforcing of the century-old dams in the late 1990s, so we learnt a bit about the cables that were drilled into bedrock and post-tensioned.  It was good to see that the stainless steel railings they fitted along the walls are still looking shiny and new. A good investment. We also stopped at the waterworks museum, which was closed. Does anyone know when it opens? Do you have to arrange it in advance or what?

 For the route home, we took a detour off the jeep track near the top of Nursery, over into Ash Valley along a relatively indistinct path. In Ash Valley the path passes the hut once operated by the Scouts but now by the Western Province Mountain Club, and then meets a broader back that takes you back onto the jeep track at the Wynberg Overseer's hut, now part of the Hoeri Kwaggo Trail. The detour is no longer than the jeep track, but much more interesting. Shortly after the hut you can turn left off the jeep track again to follow a path that descends into Cecilia Forest, which I did earlier in the year, or stick to the jeep track back to the start.


Indicentally, although it was a pretty warm summer day in town, there was a strong breeze and a bit of a tablecloth that made it grey and quite chilly on top. When it's grey and windy around the dams, it always reminds me of Scotland and the lochs. It's always worth being ready for bad weather on top of Table Mountain. The jeep track may seem like a safe and easy route, but the level section on top is very exposed in bad weather.

We were down at the cars by 12 and unfortunately we were in a bit of a hurry or else we would have stayed for a pint at Constantia Nek restaurant. Make that two.  One for the left boot, and one for the right.

2012 in review

It's been a while: a long while since my last great blog post, and also quite a while since my last great hike. It's something to do with having a couple of kids who are too large and impatient for those put-the-kid-in-the-backpack devices, and too small and impatient for prolonged exertion.

2012 hasn't been completely barren hiking territory though. In January I joined the Scouts on a couple of one-day kloofing trips to Elandspad River and Bobbejaans River, a route from East Fort over Vlakkenberg to Constantia Nek that I hadn't done before, a short night hike to the King's Blockhouse, and a winter weekend in the Cederberg, with an icy trip to the Wolfberg Arch via the Cracks and a potentially life-threatening accident at Stadsaal Caves.

With friends, I did a couple of half-day hikes, including the Jeep track/Ash Valley/Cecilia circuit, which I'll blog about shortly.  I might fill in the gaps on the blog if I find a moment, but then again, I might not

Saturday, 4 September 2010

Table Mountain - Some Easy Ways to the Summit (1913)

This is a guide book published in 1913, which I scanned, OCRed and converted to PDF... enjoy! It's an interesting read, not least to see how our use of English has changed, but also to see how the mountain has changed in some ways and stayed the same in others. Back then, there was no Tafelberg Road, so the Platteklip Gorge ascent started on Buitenkant Street. For the pipe track, you could take a tram from the city to Kloof Nek. For the Saddle, the path started at Forester's Arms. You know, all those times I've been to Forries, despite the name, it never once occurred to me that it used to be the gateway to Newlands Forest and the mountain. That was before De Waal Drive was built, of course.

Most of the routes described are still popular, but please don't head off onto the mountain following this guidebook as if it was still current. Over the past century, paths have come and gone, some ravines (Slangolie) have become largely impassable due to landslides, rights of access have changed (Orange Kloof), and our tolerance for risk (Blinkwater / Stinkwater) has also changed...

Table Mountain - Some Easy Ways to the Summit (1913)

Tuesday, 10 August 2010

Mowbray Ridge and Minor Peak

Mowbray Ridge is one of my favourite hikes on Devils Peak, not least because I grew up in the shadow of Devil's Peak, and as a student it was one of the closest hikes from UCT. Most recently I've enjoyed it because you can fit a lot of scenery and serious ascent into an energetic half day, and still be back home to spend some quality time with the wife and kids. The last time I climbed Mowbray Ridge was a date I will not forget for two reasons, one of which, tragically, I blogged about at the time. But now it's time for an article about the hike that preceded that.

Mowbray Ridge is the northeastern corner of Devils Peak, and a very windswept corner it is too, especially when the Cape Doctor blows, which is most of the time on the ridge. The vegetation and outlook changes dramatically along a sharp line: lush and bushy on the eastern slope overlooking the Southern Suburbs and Cape Flats, and dry, frequently burnt and grassy overlooking the city and harbour on the north.


At the base of the ridge is Plumpudding Hill, a rounded grassy shale outcrop above Rhodes Memorial. For years there was a radar beacon there, a sort of technological memorial to three fighter jets that crashed into Devils Peak in low cloud in 1971. The radar beacon has gone but the trig beacon and view are still there.

Further up, at the base of the cliffs, is the King's Blockhouse, another beacon and a couple of cannons. It's the best preserved of the forts on Table Mountain, and is still used as a radio relay station, I think. The area between Rhodes Memorial and the Blockhouse is unfortunately a hotspot for mountain muggings, so be warned.

Behind the blockhouse the climb starts in earnest. It climbs and scrambles rapidly through various cracks in the purple sandstone to the right of the ridge, and soon reaches a magnificent viewpoint at an old fire lookout house, now abandoned. One of the great 270-degree views on Table Mountain.

The path continues up the ridge and climbs less steeply on an open slope. At one point you have the choice of going along the Upper Traverse contour path to the right, or heading straight up the ridge. The path to the right is better in heavy wind if you have a fear of heights: straight ahead, the knife edge ahead is not for the faint-hearted, as it overlooks a huge drop into the enormous First Waterfall Ravine on the left.


The knife edge descends slightly, then climbs again, ending in a short and steep scramble to Minor Peak, just above the nek at the top of First Waterfall Ravine. Really, with the sense of achievement you get at that point, it should have a more commanding name.

From Minor Peak, you have several options:
  • Descend to Upper Traverse, and continue down to Middle Traverse, then turn left and work your way back down on a series of descents back to the blockhouse.
  • Or descend to Upper Traverse, turn left, and continue onto the Saddle from which you can slog up the final slopes of Devil's Peak (and then down Newlands Ravine, perhaps).
  • Or, if you know the way (be warned: it is easy to get lost in very dangerous terrain on this route), take the frontal ascent to the top of Devil's Peak. Again, definitely not for anyone with a fear of heights.

Monday, 7 June 2010

Wit Els 2001

While I'm on the subject of photos for Bruce... here are some photos a kloofing trip we did down the Wit Els, back in 2001. I can't quite believe it's been so long since I last went been down this magnificent river, but I'll be back one day.


Bottom hut


Middle hut


Pell's Hut, newly renovated


On the long descent from Waaihoek into the gorge.


Disa Falls, and Bruce trying unsuccessfully to get a GPS signal.


One of the swims, or perhaps one of the wades


Waterproofing the packs


Definitely one of the swims


And another


And another.


Me, at Alder Ring campsite


Dave


The gang, or most of them.

Wednesday, 2 June 2010

Tafelberg, 10 years ago

Some photos from a winter hike up Tafelberg, 10 years ago, by popular request from Bruce...


The gang, The Spout, and my favourite peak.

Snow near The Spout, and me, Dave, Lynette, Bruce, Bruce, Bruce and Bruce. Photoshopping was harder in the days before digital.

Me, tied-dyed shirt, and Sneeberg across the valley.

Bruce looking down from the Spout. Remnants of snow around Consolation Peak.

Broken MSRs at Spout Cave

Ice at the overnight spot.

Dave

Lynette

Sunset from The Spout.

Wednesday, 17 March 2010

Smuts Track: Skeleton Gorge to Maclears Beacon, and down Nursery Ravine

Smuts Track is one of the most popular hiking routes on Table Mountain. It's named after Jan Smuts, who was a keen outdoorsman and hiked this route energetically and regularly, well into his old age. Here's why I like the route.

Firstly, Skeleton Gorge. This is one of the most popular and most pleasant routes up Table Mountain. It leaves from Kirstenbosch, climbs through beautiful and shady indigenous forest, takes in a waterfall, includes a few wooden ladders and a scramble up a rocky stream bed, past a cave which is a perfect resting place, and finally emerges from the forest to give you a superb view over False Bay and the Southern Suburbs. It's not the easiest route, though: it's rocky and can be slippery near the top, and should be avoided in winter or after heavy rains, and like any direct ascent it can be challenging if you're not that fit.

Once you're at the top of Skeleton Gorge, follow Smuts as he takes a sharp right and starts a more gradual ascent from the Back Table towards Table Mountain itself. This is a superb route in its own right, with clifftop views, dramatic drops (and a detour to Carrell's Ledge if you're up to it), a ruined cottage if you have the Slingsby map, disas and watsonias in bloom at the right time of year, and bizarre rock formations.

Then the top. Maclears Beacon is the highest point on Table Mountain (1086m) and has fantastic 360 degree views over the entire peninsula on a clear day. The wind can whistle and the tablecloth can cover you at any moment though, so be prepared for a bit of chill, even in summer.

From the top, it's a flat but fairly lengthy walk to the Cable Station, or you can descend via Platteklip Gorge, which is a long zigzag staircase taking you down towards the City Bowl. A good, efficient descent if your knees are up to it, and a very popular ascent too, even if it is rather unrelenting and exposed in summer.

I prefer a longer return journey, which takes you back to Kirstenbosch. From Maclears Beacon, retrace your steps until you are about half way back to Skeleton Gorge. Then turn right and follow an old stone aqueduct, which takes you through a pleasant and secluded valley ending at Hely-Hutchison reservoir. Unexpectedly, at the century-old dam wall, there is a waterworks museum which is worth a visit.

Then the descent via Nursery Ravine. It's similar to Skeleton, with great views and pleasant indigenous forest, but it's steeper and less shady than Skeleton Gorge so I don't generally choose it as an ascent. As a descent, it is great, because it has fewer irregular rocky parts and is less slippery than Skeleton, especially in winter. It also gets you down quicker.

Monday, 1 March 2010

Karrimor Jaguar 2 - gone to a new home

Saturday was a sad day. The top section of my wardrobe was getting out of hand and threatening to tumble out all over me, and it was time to donate my old backpack to a worthy cause.

Now this was a special bag. A Karrimor Jaguar 2, 65 litres, which I bought in December 1985 when I was a 12 year old Scout and just starting to do some real hiking. It cost R127.95 less 15% discount, plus 13% GST (I kept the receipt), money I got from Christmas presents and from a smallish cash prize I won at school. It came from a tiny but outstanding outdoor store called Camp and Climb in the basement of Cavendish Square, sadly long since closed.

Good design? Yes sir. Back then it was a new-generation internal frame bag that was comfortable as heck and seriously impressed the adults and older boys who I hiked with. It came in KS100E material with a lifetime guarantee, in an elegant shade of pale green. You could yank the straps while you wore it, which they called SAS, or the Self Adjusting System. I admit the last 24 years have seen some useful innovations in pack design (although I exclude those ridiculous bladder-water-pipe arrangements from that category), but nothing as revolutionary as the shift from external frames to comfortable, carry-able, packable-and-unpackable, adjustable, internal frame packs like this one. My 24 year old Jaguar 2 was still a match for most of today's packs.

Durable? Oh yes! 24 years later and the only damage was a small worn-through slit in a side pocket, where I once packed two gaz cylinders with metal rims which wore through the material when brushing against passing rocks. I learnt a small lesson about packing from that. The unbreakable hip belt buckle outlasted several buckles on my newer Backpacker bag. And I never did get to try out the lifetime guarantee, although later bags came in a material called Silvaguard with a 10 year guarantee which didn't last nearly as well. (Karrimor, to their credit, honoured that guarantee, but Silvaguard was never a match for KS100E).

Clean? Well, no longer. In 1989 a fellow Rayner Trophy teammate kindly packed a bottle full of cooking oil in my bag without telling me, and it popped open. 750 ml of sunflower oil left some interesting tie-dye patterns on my sleeping bag, and some stains on the bag, but actually seemed to increase the waterproofing. Yes, it was washable, in a big bath of warm water and a few days in the sun to dry out the capacious foam hipbelt, but the cooking oil pattern lived on.

Well used? Absolutely. From my early teens, through my Springbok Scout hike, down the Wit Els three times at least (soaking up most of the river in the foam padding along the way), four 10-day Cederberg Adventures, all over the Cape, in all weather. I used it exclusively for more than 10 years, then decided I needed a larger 75 litre bag, but the Jaguar 2 kept going, either to lend out (it probably did more Cederberg Adventures in that role than I did) or for hikes where a smaller or older bag was more appropriate. The last major outing I can remember taking it on was the Wit Els in 2001.

Why pass it on now? You know, I'm not sure. I could have kept it in reserve and lent it out a few more times, and maybe I'll do the Wit Els again one day. But to be fair, its time had passed, and even the bag I bought as its successor is now a 14-year-old well-worn, well-travelled pack, with more hiking (and more airline miles) behind it than most packs can dream of. I could have kept it another 10 years until the kids are big enough to use it, but to be honest, it would probably not inspire the same reverence in them that I felt it deserved.

I drove around with it in the boot of my car (an Opel Meriva - similarly functional but sadly less durable) for a while, putting off the moment, but eventually I just had to grit my teeth and hand it over as a donation, along with a few other lesser items to reduce the blow.

Miss it already? You bet. Oasis in Claremont - you don't realise that you just got one of your finest gifts yet.

Tuesday, 9 February 2010

The Jeep Track or Bridle Path

The Jeep Track or Bridle Path is the easiest route to the back table, i.e. the lower part of the range just south of Table Mountain. The route starts at Constantia Nek as a gravel road, and winds up the slopes above Cecilia Forest through what was until recently a commercial pine plantation and is now thankfully being allowed to return to the natural fynbos. Closer to the top, the road is concrete, with a few rock cuttings and a bridge. On the top, there is a fairly long stretch, more or less level, that passes the three smaller reservoirs and the former Wynberg overseer's hut (now part of the Hoeri Kwaggo Trail) and then ends at the Woodhead and Hely-Hutchison reservoirs.

Sunday, 7 February 2010

Carrell's Ledge

Carrell's Ledge is one of the poorly-kept secrets of Table Mountain. It's an absurdly unlikely traverse across the cliff face at the top of Ascension Buttress, overlooking the Pulpit and Newlands Forest, which is where you would land up if you missed your footing on your way across. There are some breathless accounts on the web about how it's "only 20cm wide" (slightly wider than the white line in the middle of a road), which is a bit of an exaggeration, but nonetheless it is a spectacular crossing.

There's a rather overgrown path, not marked on the recent maps, and the start is fairly hard to find, and this is really not somewhere you'd like to get lost. So please don't try it unless you know what you're doing, and don't even think of trying it in bad weather.

Monday, 7 December 2009

Tips on setting up a new private hiking trail

There are hiking trails to suit all tastes, but to make its mark, a hike needs more than just good views, good paths and good overnight accommodation. That 'something extra' might be tractor transport to the start, a farm dog which accompanies the hikers, a real farm supper laid on, or an unusual overnight hut.

Of course the choice of route is vital. It needs available water, great views, good places to stop, not too much unnecessary uphill, and above all a route with a purpose. That purpose may be the views, a particular destination like a nek, peak or waterfall, or it may be getting from A to B along an interesting route. Most hikers like variation, so try to include a variety of terrains. Circular routes are usually more popular than ones where you end far away from the carpark at the start.

Related to the route, you need a decent map and route description, and well signposted paths. Local municipalities, the Forestry Department or one of several conservation agencies may be able to help with technical issues like maps and path construction.

To publicise the hike, your first prize would be to get a popular author of hiking books to review your hike, or to include it in a hiking column in a weekend newspaper. Another option would be an article about your trail in Getaway magazine, but that isn't easy to achieve - something in the letters page may be easier. Also check if SAFM has a slot for outdoor adventure in one of its magazine programmes.

Olifantskop trail

"What makes this Olifantskop trail in the Hexrivier, Western Cederberg, very special is that you are in regular contact with the river. It is a fairly leisurly walk to the cave, so that there is time for swims and exploration of the old farmstead halfway to the cave."

http://home.mweb.co.za/vi/vism/tours.html

(Sent in by Martha & Reinhardt Slabber in 2001)

Gansbaai to Betty's Bay

Start at the Western end of Gansbaai, known as Die Kelders, and hike along the beach across Walker Bay towards the mouth of Hermanus Lagoon. This should take you till the evening, unless you made a really early start from Cape Town. You can either camp at a campsite or holiday house in Hermanus, or risk a large fine and unpleasant awakening by sleeping on the beach or the shores of the lagoon. Not really worth it. The next day, take the beach paths through Hermanus - a surprisingly long hike, with many welcome distractions of beaches and holiday life. You should be able to get past Onrus by the late afternoon - it's probably not such a good idea to trespass on the reserve at Hoek van die Berg, with the vearious perlemoen wars in this area. There is a campsite at Hawston. From Hawston, you again hit a long beach passing Bot River mouth and the lagoon and ending at Kleinmond.

Well, here my description of the hike ends because we hitched from Kleinmond to our next night stop at Palmiet river mouth (a short hike, anyway) and then got rained on. After trying to take shelter in some municipal restrooms we chickened out and hitched to Betty's Bay.

If anyone knows anything about beach routes anywhere along the South coast between Mossel Bay and Pringle Bay, please let me know. Or along False Bay from Muizenburg to Gordons Bay - It would be an epic hike from Muizenburg to Agulhas, and I'd like to hear more about the route.

Kouebokkeveld

The Kouebokkeveld mountains here are largely privately owned so access is pretty exclusive unless you know the right person or belong to the right hiking club.

The Olifants River Dome (1621m) is a spectacular peak which is very hard to get to, along a tortuous traverse and a huge descent and ascent just when you thought you were there. The summit log shows it was climbed in 1991 (for the MCSA centenary), and next by the SMC in 1994. The peak is an 8-hour round trip from base camp at the top of Naauwkloof (where a shepherd's hut provides shelter if not warmth for 3 to 4 people, or 15 in a storm), and from the farm Schoongezicht to the camp takes 2 hours.

Another nice peak with a spectacular nek is Driekoppe (1760m?). (Spectacular is a word which you will probably use often in the Kouebokkeveld.) Unlike the Dome, Driekoppe is an easy climb and is reached in about 2 hours hiking from the campsite and about one hour back down. You can see Table Mountain easily on a clear day and all the major peaks from Sneeuberg and Tafelberg to Groot Winterhoek.

Then somewhere out there is an old shepherd's cave which has been visited maybe two or three times in a few decades. It still has the original kettle, potjie and firewood supply, and a few tins of coffee. It also has some old bushman paintings, very faint, and a magnificent view. Well worth the slog through unmarked mountains, but only a few people know where it is, and it's not a location I would want to geocache or blog about!

Torches

For a long time I found Petzl headlamps as irritating as red BMWs. Nice, expensive, owned by chops. But that was in the days of halogen bulbs that consumed a pair of batteries in a couple of hours. Then along came LED lamps and changed the night into slightly-bluish day. Now I own two Petzls including a tiny one that seems to run on a watch battery but is still as bright as all heck.

They're still not cheap though. I have a bit of a problem with expensive torces in that they're the most losable item of camping equipment, and I've lost a couple of nice ones in my time, so I don't think it's rational to spend a fortune on them.

For caving, apart from the headlamp, I take one of those cheap plastic torches you get from Clicks (it's worked for years, so why change it). But in general, cheap torches always break at the least convenient time. So I use the cheap torch and don't mind if it gets scratched, but I carry a better torch as a spare...

In moving this post from its old home to this one, I had to delete a whole lot about halogen bulbs, taking spare batteries, twisting the head of the torch to focus the beam, and maglites, which I compared to being as exciting as wearing a Nike swoosh, i.e. not at all. But as I said before, all that has changed since LED lights came along. So I'll consign that rant to the wayback machine.

For the record

Since I've written a whole lot about hiking gear (with a South African hiking audience in mind), it seems fair enough to supply a list of my personal equipment:

  • Backpacker Boulder 75l rucksack (the best bag ever)
  • First Ascent Ice Breaker down sleeping bag, in Microtex fabric (what a beauty!) with an outer by Cape Storm
  • Karrimor Epic 35l pack for day trips
  • Petzl Tikka headlamp
  • Lumogaz gas light by Camping Gaz- used a lot less since Petzl came out with LED lights
  • First Ascent rainjacket
  • North Face down jacket
  • Heavy fleece top from First Ascent
  • A couple of wick-dry T-shirts from Cape Storm and First Ascent, and a long-sleeve Nike ACG top perfect for kloofing. And a few cotton/polyester T-shirts that make good vests for winter hiking but get too hot in summer.
  • Closed-cell foam rollmat for sleeping - a much cheaper option than those inflatable things, but not as nice
  • Miscellaneous Hi-Tech boots, originally waterproof but now less so
  • Big wide-brimmed safari hat and several cotton long-sleeve collar shirts from Cape Union Mart
Other gear that I've used:
  • Coleman Apex II stove (benzene fueled, broken, whatever you do don't buy Coleman)
  • Camping Gaz Bleuet stove (replacing the Coleman, until I decide to splash out and buy a better one)
  • Dachstein boots (bought in 1995 and lasted about 10 years on their second soles)
  • Ventex/Hollowfibre jacket by Drimac, warm and once waterproof.
  • Karrimor Jaguar 2 65l rucksack (bought in 1985 and still in occasional use when I need a smaller pack or one to lend out)
  • Two Backpacker Benedorm 3 Seasons sleeping bags (each of which lasted about 3 years of heavy use before needing to be replaced. One is now a very nice duvet.)
  • Backpacker Kranz 40l pack for day trips (damn! it got stolen.)
  • Backpacker Fellman 20l which was too small for most day trips but was a great varsity bag
  • Two pairs of Trailbuster T3 boots (they died after 3 years heavy use.)

Boots

There are many alternatives, but the main choice (after price) seems to be leather vs. synthetic. There are many leather options, ranging from velskoen to some pretty hardcore bonded-sole, last-you-a-lifetime boots. The market moves pretty fast so I'm a bit out-of-date with what's now available. In reasonably-priced synthetic boots, the choice of brand seems to be Hitec or nothing, but there are more expensive options in GoreTex.

Jim Green boots are a top quality leather product, or so I'm told - I haven't owned a pair yet. They're made in the KwaZulu-Natal Midlands, and can even be ordered online. And of course there's K-Way, the Cape Union Mart brand.

Hitec has a wide range of boots. Their synthetic boots are typically very comfortable (more so than leather boots) and don't require much wearing-in. Synthetic boots definitely aren't as durable as leather, though, and unless they specifically say waterproof, they're certainly not, although even leather boots or synthetic "waterproof" boots are seldom really waterproof after extended wetting. I would recommend Hitecs over leather boots for the novice or occasional hiker. Avoid the Hitech Utah, though. I had a pair for casual use, but they were definitely not tough enough for real hiking.

For the pro hiker with tough feet, consider going for a leather boot. Various options are available, some imported and some made locally. I'm not familiar with the brands at present - for a while I had a pair of Dachsteins. They done a lot of distance in all sorts of conditions. At the moment I'm using a more mundane pair of Hitec boots.

Stoves

For the new hiker with limited budget, there really is only one alternative here: the Camping Gaz range with butane or butane/propane cylinders. Their newer range includes resealable cylinders, and there are sometimes other brands of butane stoves on the market as well.

For the pro hiker, avoid the Gaz stove - for a rather higher price you can get a benzene stove which is hotter, more robust, cheaper to fuel, less unstable and less susceptible to wind, cold and high altitude. I bought a Coleman Apex II, which looks like a moon landing unit and is hot as hell and a great talking point. BUT... read on to find out why I stopped being a Coleman fan.

Well, only 4 years into it's supposed 10-year lifespan, my Coleman stove decided to spring a leak in the fuel line, letting loose a gentle arc of benzene - very fortunately not spraying over the flame itself. As far as I'm concerned that doesn't consitute "fair wear and tear" - it's either a basic design flaw, poor materials, or poor workmanship. Nor can I recommend Coleman aftersale service in Cape Town, which is 100% non-existant, or in South Africa as a whole. Meantime, I no longer recommend Coleman products. Anything so expensive that (a) breaks and (b) can't be fixed at all is not a decent hiking product. If anyone from Coleman wants to convince me otherwise, I'm open to offers.

The top range of imported stoves comes from MSR, and includes the Whisperlite and XGK (what would we do without American outdoor technology? But that's another debate). They're even hotter than the Coleman range: my Coleman Apex II was once convincingly beaten by a Whisperlite in a time trial, boiling 1 litre of water at 800m altitude in a light breeze. The Gaz stove didn't even reach boiling point. But temperature control is not an option with MSR: if you want to get one to simmer, there's a complicated mantra and a chicken-slaughtering ritual you need to learn first. The only thing hotter than an MSR or Coleman stove is the debate over which of the two is better.

GETAWAY magazine once rated butane stoves as better than the Coleman / MSR ranges - but they did their tests at sea level, with no wind, and at 20 Celsius. Heck, no-one uses a stove in those conditions, and butane stoves hardly work in wind, altitude or cold. And when they say butane stoves are safer, I've seen several gas accidents on Gaz stoves when novice users don't know how to change a cylinder, so beware...

Backpacks

When buying a pack, size is the main consideration - 75 litres is big enough for most purposes. There is not much to choose in this market - the current generation of internal frame packs all seem well designed and durable. Locally, Karrimor and is the best known brand with a well-proven record, but other brands are available - some local, some imported.

Apart from plenty of hiking, my Backpacker Boulder has also done excellent service on several overseas trips. A friend of mine modified his pack so he can padlock it, but with a few knots in the straps and putting discouraging things like dirty underwear in the outside pockets, I reckon you can discourage most luggage tamperers.

Final comment - young hikers should not go for a small pack "until they get bigger". Packs are so pricy that they will be stuck with a small pack which becomes increasingly frustrating after a year or two. Go for a "real" pack as soon as you can, or borrow until you can afford to buy one of your own.

Day packs

There are several schools of thought here - some people prefer to cram everything into some sort of tiny hipbelt, others like to carry a full overnight bag, sometimes even stuffing it full of bricks "for training", others like a camel pack, or is it a bladder, or a camel bladder. Well, each to their own taste.

The usual compromise is to get something like a 20l day pack, which is big enough for your basic day kit and also doubles as a handy school or varsity book bag. Not a bad option, but not very individual.

On day hikes I prefer to eat well, carry lots of water, a bulky camera, map, 1st aid kit, and a few warm and waterproof alternatives in case the Cape mountains pull a fast one and it ends up snowing in mid summer. I gave up trying to fit all this kit into a traditional 20l day pack, mainly because I don't like carrying something that feels like a lead soccerball on straps.

My current day pack is an aged Karrimor Epic 35, which is a comfortable teardrop-shaped bag with plenty of space and some handy features like exterior mesh pockets. I use the Epic as hand baggage on overseas trips. It's big enough to fit a laptop inside, in the laptop briefcase, nogal.

My current favourite daypack is the K-Way Kilimanjaro, which my wife uses. It's a medium size daypack with a light frame to allow air to circulate between the pack and your back.